Wednesday, September 2, 2020

A Boy and His Van: Why Do I Keep Fuckin' Up?

I’m learning that converting a cargo van into a camper van is a reasonable microcosm of life. This is at least true for someone like me possessing few of the skills in advance needed for successful completion of the project. In this van project, as in life, constant learning, striving, occasional failure, and trying again is the only path forward. 

In recent years, with the assistance of a skilled local therapist who my family has come to refer to only half-jokingly as Saint Nancy, my self-awareness has slowly increased. I’ve come to realize that at various critical junctions in my life, I’ve made rash, often damaging decisions in an attempt to avoid failure and flee situations that subconsciously I felt I couldn’t successfully face. I’m gaining a better understanding of why I’ve behaved in this manner, and I think I’m getting better at recognizing when this impulse is driving my thinking, changing my thinking, and avoiding regrettable actions. I haven’t always been successful, unfortunately. To protect the innocent, I will say no more about regrettable actions in larger life, but will say a bit about the van project in this vein.


Those who know me will not be surprised that Neil Young’s music is well-represented on the sound track that plays in my mind. One of the songs that has played loudly and frequently recently is “Fuckin’ Up,” first recorded in 1990 on the album Ragged Glory. It played on repeat and loud after a couple of recent major steps in the van build process: insulating with two-part foam and wiring the van’s electrical system.

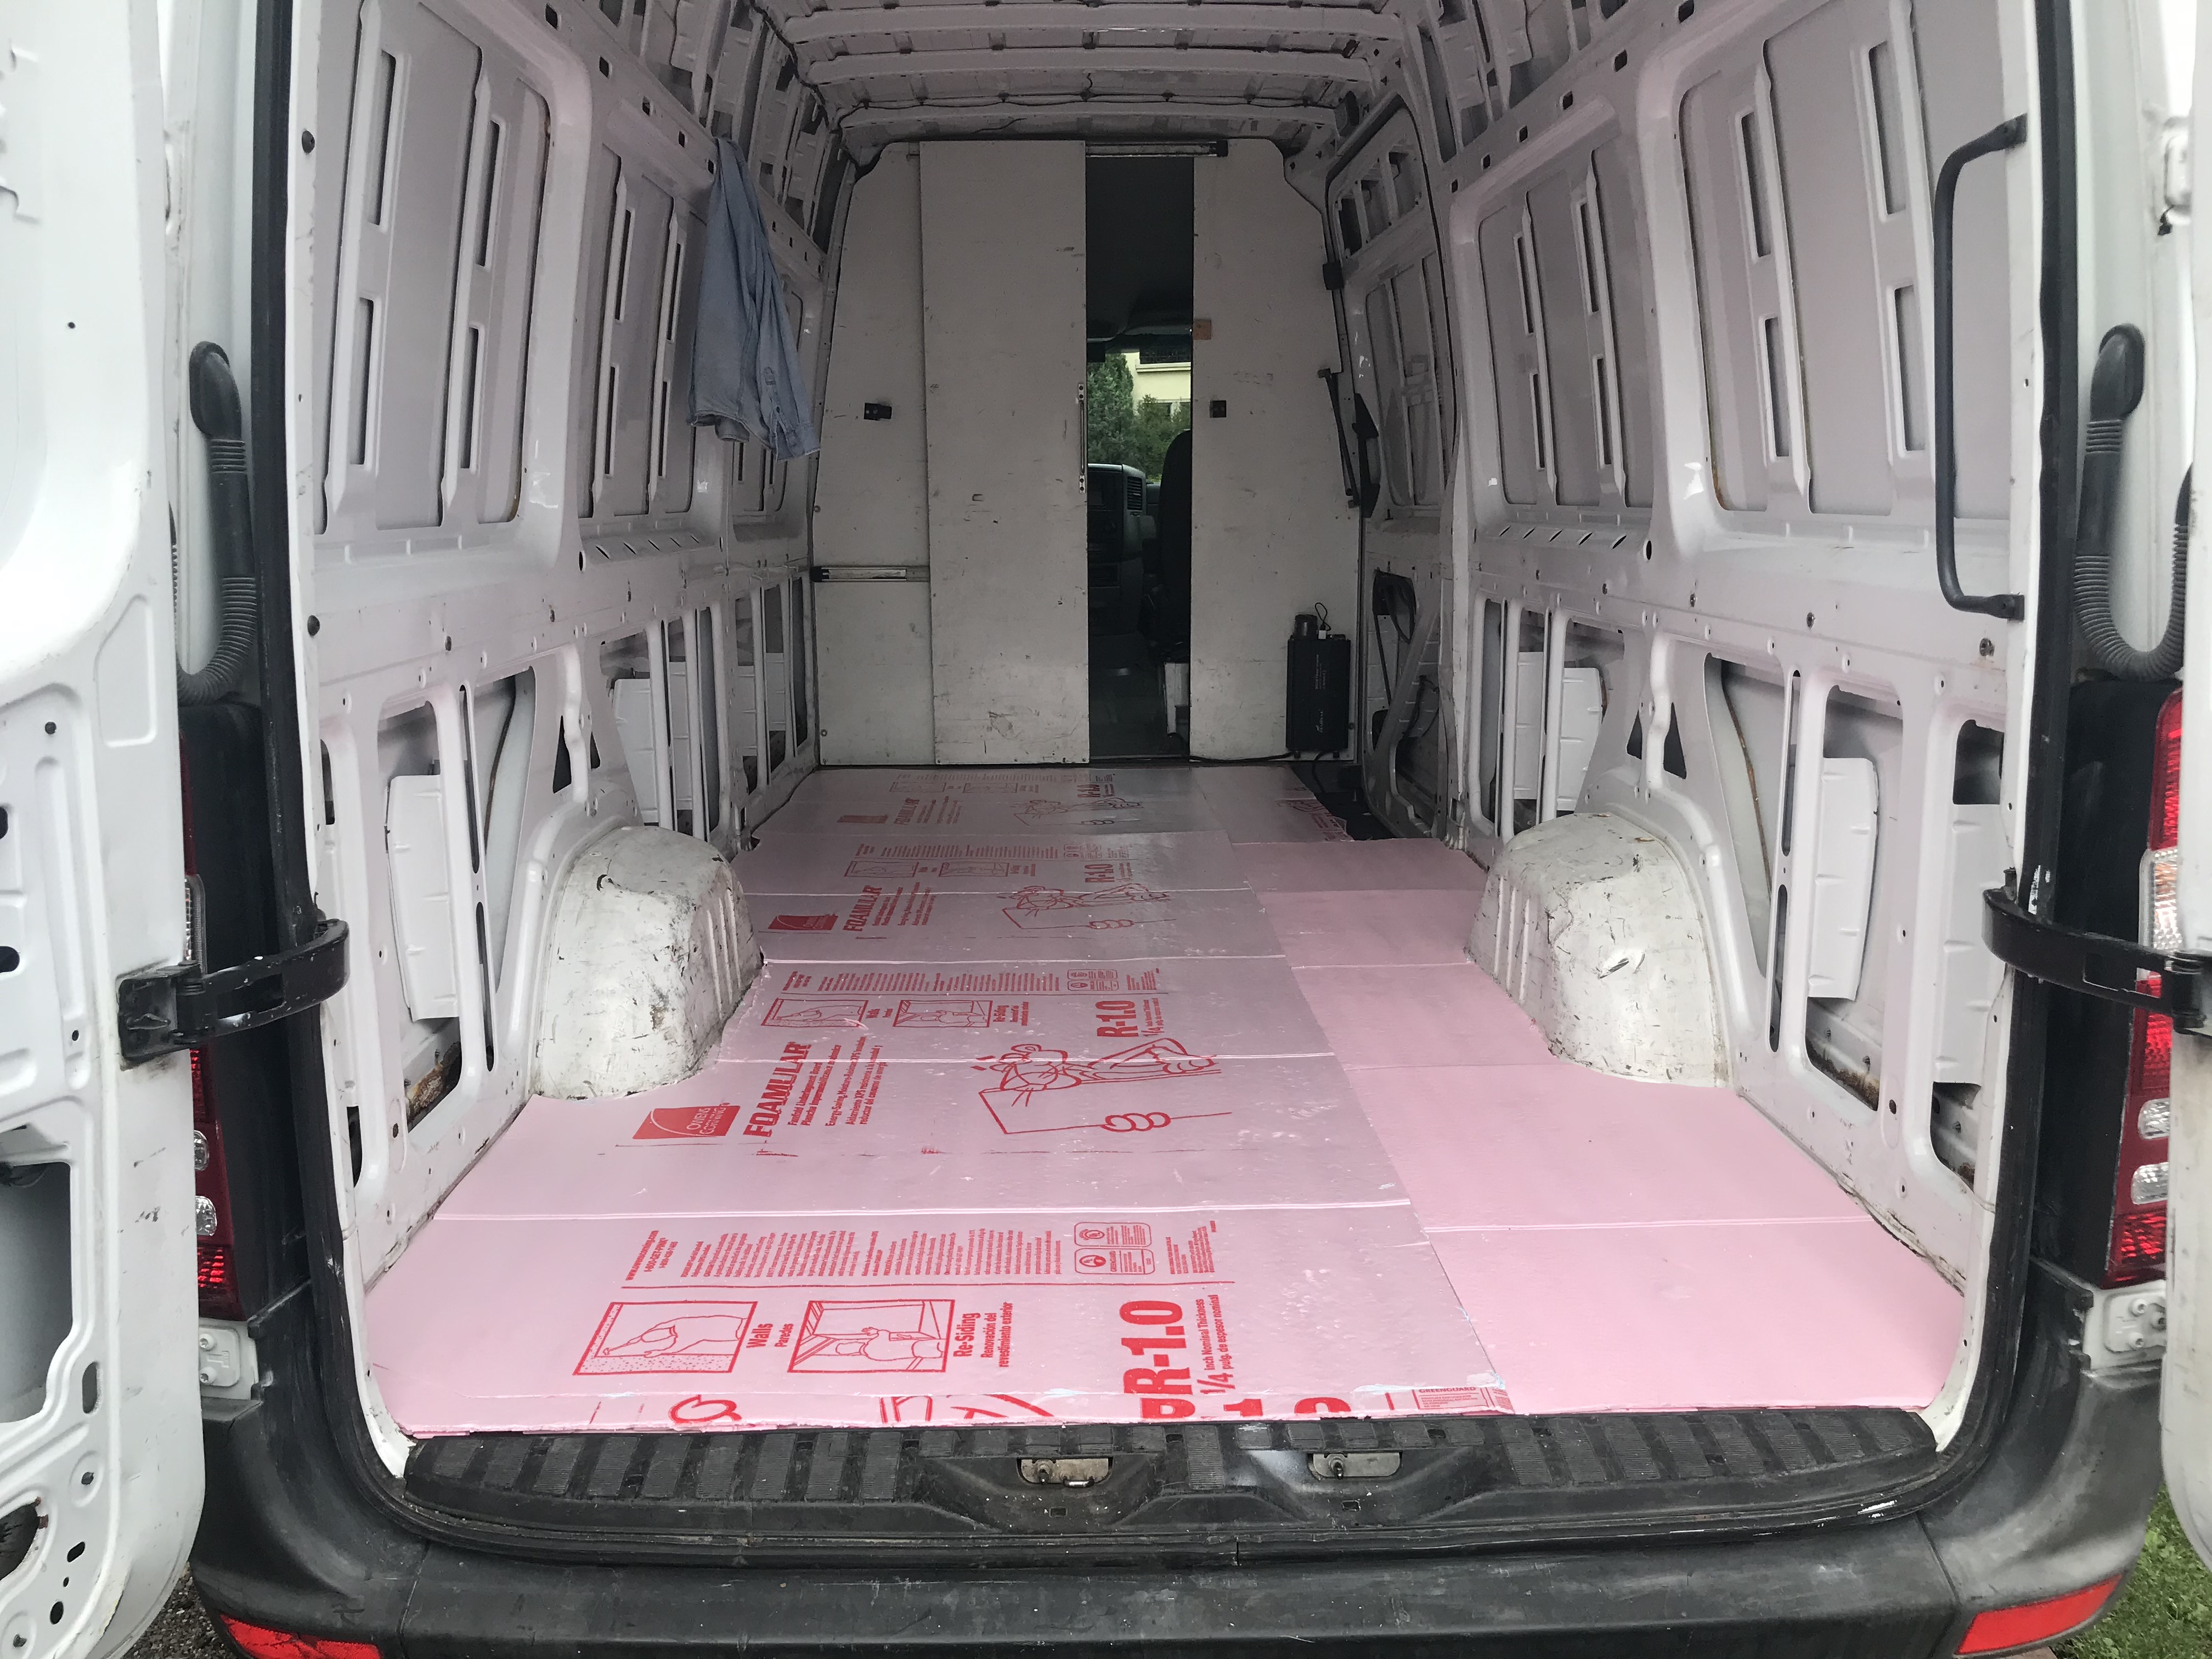
The two-part foam insulation process was familiar to me, as I had contractors use this insulation method innumerable times in weatherization projects over the past 11 years. However, the number of times I’ve actually done it myself: zero. After watching several YouTube videos and reading about several vanlifers’ experiences insulating their vans, I felt ready to take on the task. I purchased about $700 worth of two-part foam and the specialty spray gun required to mix the two parts, suited up in a Tyvek suit, nitrile gloves, and full respirator and launched into the messy process. An hour or two later, I felt pretty good about it on completion…until I tried to open the side cargo and rear doors and found to my horror that I had somehow gummed up the door latching mechanisms and was unable to open either door. 


After several days of mentally beating myself up (“Why do I keep fuckin’ up?” playing on repeat), and deciding I didn’t want to risk further damage, I swallowed my pride, scheduled an appointment at Valley Autohaus, and asked them to make the doors work again, please. Several days and $490 later, the doors worked better than they had before. Onward.


The next major step, wiring the van, was a complete plunge into the unknown. Although my father is an electrical engineer and a do-it-yourselfer in all things, including things electrical, I had successfully navigated the first 62 years of my life without learning much of anything at all about wiring and electrical theory. After a lot of online research and another batch of YouTube videos, I was ready (I thought) to install the following 12-volt components:

·      Eight ceiling LED puck-style lights (two circuits on dimmer switches)

·      Two bed-side LED gooseneck reading lamps

·      The ceiling Maxxair exhaust fan

·      The tiny Dometic refrigerator

·      The Nature’s Head composting toilet make-it-not-stink fan

·      The plumbing system pressurization pump 


All of this was powered, of course, by the van’s two 100-watt solar panels and a 170-amp-hour lithium storage battery. In addition, 110-volt power will be provided via a 2000-watt inverter for a tiny seven-gallon electric water heater, the countertop induction two-burner stove, coffeemaker, and anything else we want to plug in (laptop, phone chargers, etc.).


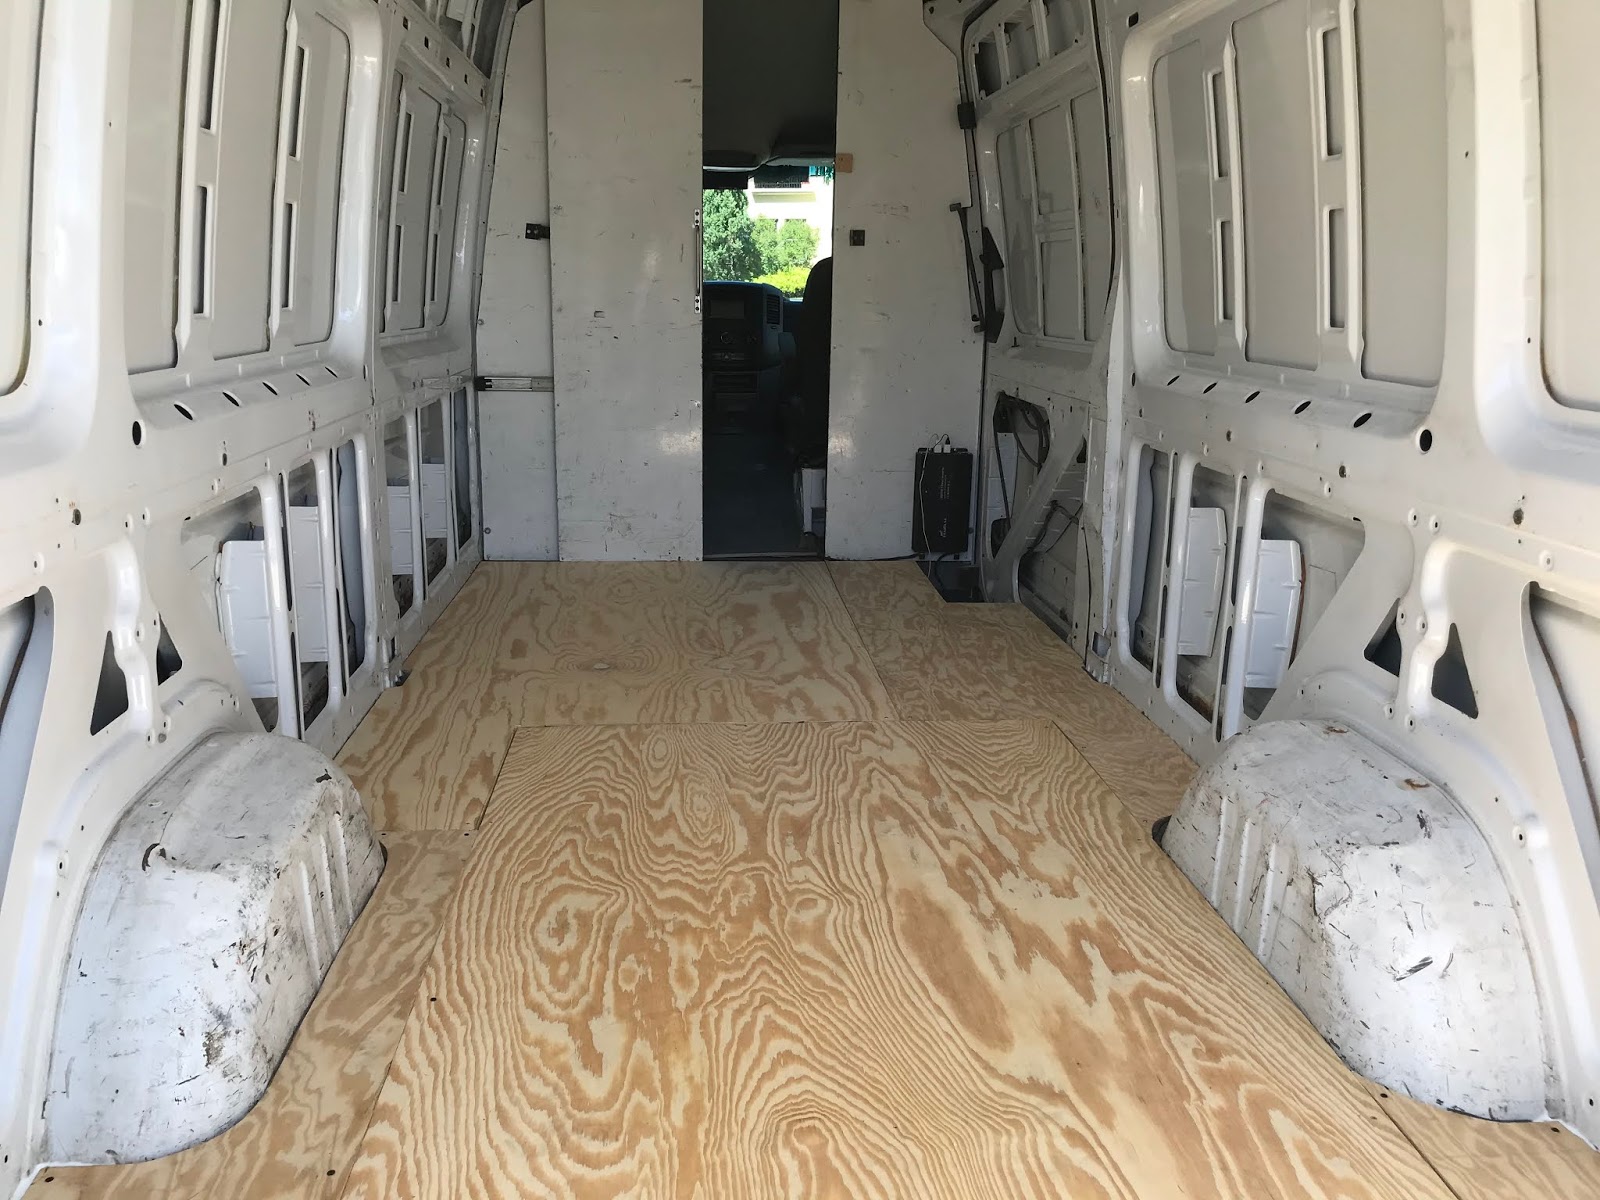
I toiled mightily for several days cutting wire to length and crimping on male and female connectors to various bits of 18- and 14-gauge wire, taking great pains to keep my positives and negatives straight. I set up my 12-circuit DC blade fuse box, labeled carefully. Kept my positives and negatives straight, double- and triple-checking to ensure that I kept them straight. To install the eight ceiling LED lights and exhaust, I had to cut carefully-positioned holes in the plywood ceiling panels. Finally, I enlisted son Jakob’s assistance in hoisting the ceiling plywood panels into place, cutting them carefully to fit into the front and back curvy bits of the van’s ceiling, wedging them into place, and screwing them home with the eight LED lights and Maxxair


exhaust fan in place and their wires tucked between the plywood and foam insulation above. 


The moment of truth arrived when I hooked up the load positive and negative wires to the solar system’s controller, installed fuses in the blade fuse box for each circuit…and nothing happened. Nothing turned on. Well dang. 


Unfortunately, this final step was occurring on the morning that Anne and I planned to leave to take the van on its first short trip (a three-night affair on Lake Superior’s North Shore, camping at Temperance River State Park). We loaded up the slightly less than half-finished van and headed out with no power. The composting toilet came with us for night-time pee use, but without the no-stink fan, we elected not to use it for its composting function. The plumbing system is sitting in our basement, yet to be installed, so there was no need for the plumbing pressurization pump to be installed anyway. We brought our headlamps for bed-time reading, a cooler for our cold food, and had a wonderful three nights and four days, in spite of having no lighting, no refrigeration, and no ceiling exhaust fan.


Upon our return, a bit of research on the controller function led me to the realization that I had to change a setting to send power to load. I changed the setting, and…lights in the back half of the van! Refrigerator purred into action! Unfortunately, the fuse for the front half of the van lighting instantly blew, as did the fuse for the ceiling fan. 


Needless to say, this was a disappointment. I tried upping the size of the fuses for the two failed circuits, but they instantly blew again, and the dimmer switch for the four front LED lights instantly went up in smoke as well. Houston, we have a problem. (Cue “Fuckin’ Up” in repeat mode in the internal play list.)


As I said, my understanding of electrical theory and general wiring practice was nonexistent at the beginning of this process. By this time, it was marginally better, but still shaky at best. I decided I needed to call in The Old Pro, and phoned my 88-year-old dad to come and try to help me troubleshoot the system. He arrived with his multimeter shortly later, and we began checking the faulty circuits. We probed, we checked, we determined that we had open circuits and no shorts. Long story short, The Old Pro recommended that I purchase four new LED puck ceiling lights and dimmer switch for the front of the van and start all over again with that circuit. He was as mystified as I was by the ceiling fan, and I decided to call the manufacturer to see if they had any insight into where I had gone wrong with that. 


While waiting for the LED lights and dimmer to arrive and spending a fruitless 40 minutes on the phone being assured that I would be served by the next available Maxxair representative, I did a bit more research on problems with the Maxxair fan installation. The only thing I could find was a poor fool who had inadvertently reversed the polarity on the fan (black does not connect to black on 12-volt systems – black is positive for reasons unclear to me in the 12-volt world). He switched the wires and the fan worked fine. Could I have inadvertently done the same? Impossible. I had double- and triple-checked the polarity of all my connections. Unfortunately, I couldn’t check the wiring without dropping the ceiling panel (which would be a major hassle entailing disconnecting the four working LEDs installed in the back half of the van as well). 


Anne and I decided to do one more short trip with the van before her teaching year began. We decided to bring sweet Ruby, our 12-year-old cairn terrier with us to see what she thought of van life. We loaded up the van again, this time with the rear LED lights and refrigerator working, and headed to Wild River State Park on the St. Croix River for a quick one-night trip. We (including Ruby) had a wonderful time, with the van a tiny bit closer to its finished state (though still far, far from finished). 


 Upon our return, I decided to just go ahead and switch the positive and negative wires anyway and see what happened. When the new LEDs and dimmer switch arrived, I again went through my crimp and connect routine with the LEDs and dimmer, making SURE that everything was connected properly, called in son Jakob again to drop the front ceiling panel down, removed the failed LEDs, reinstalled the ceiling panel, powered the system back up, and…YES! The lights worked! The fan sprang into action!! All was now well with the entire electrical system!!! JUBILATION!!!


 Whew. I feel better about things now, and perhaps capable of finishing this dang project. I have resolved to work harder on my inner sound track. I realize that I am taking on a significant challenge in this van project, that mistakes will inevitably be made, but that I will learn and recover from them and move on. Henceforth “Fuckin’ Up” will be rejected firmly whenever it begins to howl in my head. Sorry, Neil. 


Onward to the plumbing system.

Friday, July 10, 2020

A Boy and His Van: Cutting Scary Big Holes

The past few weeks have been beastly humid and hot here in southern Minnesota, not particularly conducive to doing work on a van that sits in the sun in our driveway most of the day before the house shades the rig late in the afternoon. Because of that, I’ve mostly been planning the electrical and plumbing systems and propping up the American economy by madly ordering components online and saving big money at Menards. Virtually all the money that’s going to be spent on this project has now been spent. Our savings account is a bit depleted, and FedEx and Amazon deliveries are showing up nearly daily with weird and esoteric van parts. Seven-gallon electric water heater! LED puck lights! and on and on. Mostly I’m experiencing much eagerness to get this dang van built out and exploring the beautiful world!


Some serious tangible progress has been made when the weather has allowed. Last weekend I ventured onto the roof of the rig when the sun disappeared behind our house and started making holes, small to middling large. I first installed a state-of-the-art Maxxair Maxxfan Deluxe 7500 (10 speeds, exhaust or intake, all remote controlled from the comfort of one’s bed or chair). I was planning to install a bit less pricey Maxxair model, but van build components have pretty much dried up, and the less spendy models were backordered and would not have been available for a month or two. (I guess I’m unwittingly part of a pandemic trend, as reported in the New York Times on July 3rd -- “The #Vanlife Business Is Booming”).

Fan installation required cutting a 14” by 14” hole in the roof, which was good practice for the window installations which happened later in the week. All went well with the exhaust fan, and it’s now waiting to be wired in after insulation is complete and the balance of the electrical system can be installed in a week or two.


Only small holes were needed for the electrical cables from the two 100-watt solar panels I next installed on the roof. The PV panel brackets had to be screwed into the roof, so van shell penetrations are now being made in earnest.

I’m using high-quality specialty sealant which I hope will mean no leakage. Time and a few good rain storms will tell. 


This was all preparation for the really big show, installing two windows, which happened Friday, when the weather finally cooperated (i.e. less than Hades-worthy dewpoint and no likelihood of rain). I’d watched several how-to YouTube videos, read and reread the manufacturer’s instructions, and was guardedly optimistic that I wouldn’t absolutely ruin the van by fucking up the LARGE holes I had to cut in the van side door and driver-side wall. 


The beautiful windows, manufactured by Peninsula Glass of Vancouver, Washington, came with good instructions but no templates for cutting holes of precisely the right size and shape in the van, which is a kinda important part of the process. I was a bit irked by this, but tracing out templates on cardboard required attention to detail but was not particularly difficult. Tracing around the templates on the inside of the passenger-side cargo door, where one of the windows was going, again required attention to detail (correct positioning, level, etc.), but wasn’t what really caused me to sweat. The point of no return was drilling pilot holes for the curved corners,

tracing out the rest of the cut on the exterior of the door, firing up the angle grinder to GRIND BIG STARTER HOLES THROUGH THE DOOR, and then carefully, carefully, cutting out the entire hole with a jigsaw (using a 36-tooth-per-inch metal-cutting blade).


(I have to take a brief digression here to explain the depths of Anne’s entirely justified skepticism about my abilities to successfully pull off this and the other somewhat challenging elements of the van build. I would be the first to admit that I don’t have mad handyman skills. I’ve done some semi-ambitious home improvement projects, such as insulating our attic, dense-packing our stucco sidewalls with cellulose, insulating our basement with 2” extruded polystyrene, building a greenhouse and woodshed  with mostly scrounged materials, and converting our garage into an insulated, wired, and heated honey-processing space during my brief and unsuccessful career as a beekeeper, but none of this required skilled labor, and the results, while functional, don’t demonstrate extreme craftsmanship. I’m not a perfectionist, but I’m capable of learning and getting things done when I want to. Which isn’t often. End of digression.)


After sweating through cutting out the first window hole, the moment of truth had arrived. With much trepidation, I took the window to the hole to see whether it fit properly into the opening… and it did! It didn’t fall through a too-big hole, which would have been an irremediable calamity. It didn’t even hang up on any of the tiny wobbles in my less-than-perfect jigsaw cutting job.

Jubilation! Exultation!


I next had Anne come out of her hiding place, where she had no doubt been fearing that I was in the process of rendering our van worthless, and assist me with final positioning and secure installation of the window with sealant and screws. My t-shirt was soaked through with sweat by the time I finished, mostly because of the high anxiety of the process. 


After taking a break for lunch and rehydration, the second window went in without much fuss, as I was now feeling pretty much like an expert van window installer. I may go into business as a van window installer! Skillz! I’m rewarding myself with an early happy-hour gin and tonic, and no one can stop me.


I will bask in the satisfaction of successfully completing this potentially catastrophic step for a day or two, but the next learning opportunity looms. As soon as Sunday, I plan to slip into a Tyvek suit, don nitrile gloves and a respirator, and insulate the van’s walls and ceiling with two-part spray foam. Not nearly as much potential for disaster, but it could be a mess. Stay tuned!


Friday, June 12, 2020

A Boy and His Van: Things Are Getting Real

It's been three weeks since I last wrote about the van build. The hiatus was partly due to the van being in the care of Valley Autohaus for frame welding repair and some semi-major body work for 10 days or so, and the resulting delay on my work on the van build. It was also partly due to the social upheaval resulting from George Floyd's murder by a Minneapolis cop, and the peaceful protests and violent rioting, arson and looting that accompanied the peaceful protesting. I felt it would be unseemly to be writing about this personal project at a time of such pain and outrage.

The events since George Floyd's murder on May 25th give me hope that, in spite of powerful reactionary forces in our country, progress is possible toward an honest society-wide discussion about how we as a people can address the legacy of 400 years of racism in a country literally built on stolen land and slavery. Blacks, Indians, and people of color have of course always been painfully aware of this legacy, and the need to fight its consequences. It's way past time for us white folks to engage in this work as well. 

I rode my bike up to Minneapolis on Thursday, June 4thin an attempt to better grasp the enormity of what was going on less than 40 miles from home.  The George Floyd Memorial at 38thand
Chicago and the memorial service I could view from a distance several miles away at North Central University on the edge of downtown Minneapolis were moving and sobering. The torched buildings and graffiti from the arson and looting that happened nearby in south Minneapolis stood as stark testimony to the pain and rage of marginalized communities. I realize full well how fortunate and privileged I am as a white guy living in a peaceful small town. I realize how different the lived reality of black Americans and Indians and people of color is. Time will tell how much progress we the people can make toward creating a more just and equitable society.

Meanwhile, life goes on in other ways. There are bike rides and walks to be enjoyed, and garden
work to bring peace and the first fruits of our seasonal labor (spinach, kale, and radishes are coming in abundantly, with much other produce to follow soon). In spite of the pandemic and racial unrest, life is good. 

The van has been back in our driveway since last Friday. Valley Autohaus did a good job repairing the damaged frame cross-member and cancerous rust at the base of the side door and one of the rear doors. I also had them repair some rust above the windshield and on the side columns along the windshield after I began working on it myself and 
realized that a) I would likely die in a fall as I tried to finish the work above the windshield without scaffolding or other means of safe support and b) the windshield would have to be removed to adequately repair the rust and keep it from returning soon. We spent more than I expected, but I'm very happy with the results, and we're still under budget for the project.

With Valley Autohaus’ work out of the way, it was time to start the build in earnest. I began this by insulating the floor and installing the plywood subfloor. While the walls and ceiling will be insulated with 2”-plus of two-part polyurethane spray foam, which I’ve ordered from Menards (due in Monday June 15th), the floor doesn’t lend itself to use of spray foam for a couple of reasons. The first is that a flat base is needed for the subfloor, and spray foam, which expands as it cures, does not lend itself to
providing a flat surface. The second is that the Sprinter floor has many narrow (1 ½’ to 2”), shallow channels, and it isn’t possible to add much insulation in the channels anyway. Building the floor up with 2 x 2s to create space for more insulation isn’t an option either because I’m 6’ 2” tall, and there’s only 6’ 4” of clearance from the existing floor to the existing ceiling. After installing plywood subfloor and flooring, and a thin ceiling treatment, there will be precious little clearance for my head, and I don’t want to have to crouch and slouch around in the van. Because of this, I elected to cut narrow strips of ¼” extruded polystyrene
foam sheathing (“Foamular”) to fit into the shallow channels (two layers in some places, with narrow channels inside wider channels), then cover the entire floor with ¼” Foamular before laying down 5/8” plywood subfloor.

It was an exercise in careful measurement and cutting, both of the foam and the plywood, working around the wheel wells and other bumps in and out, but it was not particularly difficult work. The end product is a flat subfloor, and I’m now ready to move on to more challenging steps. 
I did take one more step forward yesterday. I was able to cut to length and reinstall the “E-track” racks that were bolted into the sidewalls by a previous owner as the means of anchoring support cross-members for our eventual queen-sized bed platform. I also used salvaged 2 x 4s as the cross-members that the plywood bed platform will go on.

Earlier in the week, I installed a ladder on the rear door of the van. This will allow easy access to the roof for installation of an exhaust fan and the solar panels that will power our mobile tiny house’s LED lighting, countertop induction burners, tiny refrigerator, and tiny electric water heater. (Tiny and efficient is the thing!) The refrigerator and solar system are already delivered but yet to be installed. Things are getting real!


Wednesday, May 20, 2020

A Boy and His Van: The Nasty Work

When contemplating building out a camper van, one's mind goes to the finishing touches that will make the plain vanilla, blank slate cargo van you start with into a tiny home on four wheels. The queen-sized comfy bed with storage room underneath for a couple of bikes. The electrical system that will work its photovoltaic magic and convert solar power into reading light, cold beer and food in the fridge, and induction burner cooking. The hardwood table that slides out from storage below the bed. The beautiful exposed wood everywhere. The composting toilet, and yes, the hot shower.

Before getting to these desired ends, though, less glamorous work has to happen first. Insulating the walls, ceiling, and floor. Installing flooring, siding, and ceiling treatments. Building storage compartments, seating, shelving and cabinets.

The adventure van in its work-life configuration

Before even the less glamorous work can begin, however, the truly nasty work must be done, and that's where I've been for the first few days of the van buildout. In its previous 10 years of life, the Sprinter was a working rig, the first nine years as a Ryder fleet van, and the past year hauling stuff to special events. I've described the van as a blank slate, but that's not entirely true, since it had battered, thin plywood flooring, cheesy ceiling material, hard plastic sidewall, side door, and rear door interior covering, and a carpeted built-in thingy of indeterminate purpose glued and screwed in place along most of the driver's side of the cargo space wall. All of this had to come out. There's also some minor surface rust in numerous places on the van's exterior, which will need to be ground down, sanded, primed, and painted.

"Oops, I just ran over a boulder. I think I'll just ignore that."
The cancerous rust at the base of the cargo side door and one of the two rear doors will need to be dealt with, too, and I've elected to have Valley Autohaus do professional repair of this nastiness. They will also be doing the welding repair required on the frame front cross-member that was badly damaged. How can you do this kind of damage to your frame and just ignore it?!? Oh well. My friends at Valley Autohaus will make it stronger than original. While I intend to do just about everything else on the van myself, I'm happy to pay someone else to do major work affecting the safety and longevity of the vehicle that I lack the skills to do myself. Yay for Valley Autohaus!

The first order of business for me was tearing out the ceiling (simple) and sidewall/door panelling (easy). Ripping out the built-in, carpeted thingy was a bit more difficult and heavy to drag out of the van on my own, but very doable.

Removal of the flooring was more time-consuming and difficult. A number of the bolts holding down the thin, battered plywood were badly corroded after 10 years of hard use. Even after soaking with penetrating oil, two bolts proved impossible to remove, so I fired up my angle grinder and cut them out. First fun with power tools! Success!

Under the plywood was an asphalt-based underlayment, some of which pulled up easily. However, a fair amount of it was stuck to the flooring, and had to be laboriously hand-scraped and removed bit by bit. Eventually, all the nastiness was successfully removed from the floor. Ten years of accumulated crud was scraped from around the perimeter of the plywood flooring base, and the interior of the van was now fully exposed. This leaves the van ready for the next stage of the nasty work, dealing with the exterior surface rust. I'm going to wait on that until Valley Autohaus has completed their work, probably sometime late next week, so actual work on the van will be on pause until then.

The few days of nasty work was broken up by garden work, biking, and other semi-retirement pandemic fun, so it wasn't non-stop nasty. I'm looking forward to seeing what kind of work I can do with my grinding, sanding, and painting skills to get the van looking reasonably good on the exterior. It won't be perfect (in the right lighting, you can see ghost lettering from the van's Ryder incarnation), but I don't want to go to the required effort, time and expense to repaint the entire rig myself. When I asked Valley Autohaus for a ballpark estimate for repainting the entire van and was told it could be in the $10,000 range, Anne and I decided we could live with a tiny bit of cosmetic imperfection.
The slate is now pretty much blank

After Valley Autohaus' work, and dealing with the minor surface rust myself, the next steps will be more dramatic: I'll be installing two new windows (t-sliders to allow cross-ventilation; one in the passenger-side cargo door, the other on the driver's side a bit further back in the van), and insulating the entire interior.

Installing the windows will involve cutting precise window openings in the van, the prospect of which is a little bit daunting, but I'm game. I figure I can carefully follow a traced template, with small guide holes drilled along the way, with a jigsaw without too much trouble.

Insulation I know. When you travel down the rabbit-hole of camper van buildout recommendations on the interwebs, all manner of insulation is recommended and debated. One of the intriguing possibilities is sheep wool, which is touted as a natural, non-toxic alternative with attractive moisture-absorbing and -release properties. However, I'm opting to go with a higher-performance, less organic option, the tried and true two-part polyurethane foam which I've had contractors installing in home rim joist spaces and other home insulation applications for many years. It has an extremely high R-value (6.7 per inch), provides a moisture and air barrier, and is recommended by many in the van life community. I've never actually installed it myself, but I'll pick up a kit from Menards, along with the required spray gun, Tyvek coveralls, nitrile gloves, and P100 respirator, and have at it once the windows are installed.

Onward!


Tuesday, May 19, 2020

A Boy and His Van: Prologue and Day Zero


Prologue

I’m a freedom-loving, adventure-loving kind of human. When I’m not engaged in an adventure (micro- or otherwise) of some sort, or gardening, reading, spending time with my love, my family, or friends, there’s a high likelihood I’m reliving a past adventure or dreaming and scheming about a future adventure. In recent years, dreams of future adventures have often included fantasies of an adventure van of some sort.

Mind you, lack of an adventure van has not stopped me from adventuring for the first nearly 62 years of my life. Many adventures begin and end at home, on foot or on a bike. When motorized transport is required for more distant adventures, an assortment of small, fuel-efficient vehicles have fit the bill for getting me from home to wherever said adventure begins, and back home again. My adventure mobile for my first solo backpacking trip in the Canadian Rockies in July 1979 was a 1968 VW Squareback (orange, with a sunroof if you must know). It got me there and back, though it literally died in my parents’ driveway, never to travel under its own power again, after a nearly non-stop 1300-mile return trip left its front struts in a state of collapse. My most recent adventure mobile, my 2016 Toyota Prius, has gotten me to the Wind River Range and Grand Staircase-Escalante National Monument for backpacking trips, to the BWCA several times for canoe trips, and has hauled wild rice home from rice-harvesting trips in 2018 and 2019. In between were a VW Fox station wagon, a VW Rabbit diesel hatchback, a Mazda B2000 small pickup, a Honda Civic hatchback, a Saturn station wagon, a brief and unsatisfying stint with a Toyota Previa minivan (no!), two VW Jetta diesels, and a 2012 Toyota Prius which came to an untimely end when a distracted driver tried to kill me but only succeeded in totaling my car. All of these rigs served me, my family, and occasional rice-harvesting and canoe-trip partners admirably in getting us to wherever we needed to go.

However, in recent years several factors led me to believe that the quality of my adventure time would be enhanced by a dedicated camper van. The biggest factor is that my wife of nearly 38 years, Anne Larson, has developed an aversion to sleeping on the ground and getting out of a tent in the middle of the night to pee. This is a not-uncommon aversion, I have been told. Anne and I shared a number of canoe and backpacking adventures in the early years of our marriage, and had a number of fun car-camping trips and canoe trips with our kids, but her zest for camping dwindled as the years progressed. It’s been many years now since she and I have camped together, even though she loves to hike and explore beautiful natural areas. She has always been intrigued by the prospect of having some kind of camper, and I have been coming around to the idea of a camper van in recent years. 

A second major factor is that, as I age, while I still love wilderness experiences and am happy to sleep in a tent for long periods of time when I’m hiking or canoeing in the wilderness, as the end of the experience approaches, I find myself fantasizing about taking a shower and sleeping in a bed at or near the trailhead upon my exit, not camping yet another night. Similarly, at the start of the trip, I’m not keen on car-camping and sleeping in a tent for one or several nights en route before getting to my ultimate adventure destination.

Finally, Anne and I both love to take road trips, exploring small towns and out-of-the-way landscapes. I’ve thought in recent years that these kinds of trips could be much more enjoyable for us to share in a camper van than driving in our Prius, and then staying in a motel or Airbnb place every night. We shared an epic road trip in July 2019 to Novia Scotia and Newfoundland, and while we enjoyed the various places we stayed on the trip, we both realized we would have loved having a camper van to stay in at day’s end wherever we were on the trip. The thought of camping in comfort in our own mobile tiny house has finally come to hold a lot of appeal for Anne and I both.

For all of these reasons, I started investigating what it would take, in money and effort, to do a camper van conversion myself. Anne and I are people of modest means, and we couldn’t afford to buy a new ready-made camper van (easily into six figures). We weren’t even interested in spending the kind of money it would take to buy a quality used camper van ($50,000-plus). After a fair amount of research, I became convinced that I could do a conversion myself, and get a quality, affordable rig built out for less than $20,000 including the purchase price of a used van (net cost after taking out the amount we will clear for selling our older used Toyota Tacoma pickup, since the camper van will also serve as our second family vehicle for other occasional general use). In addition to the cost savings, I was attracted to the idea of building something exactly tailored to our wants, needs, and aesthetic taste.

I won’t bore you with the deliberation over choice of vehicle type. Long story short, I decided that a high-roof Sprinter cargo van was the vehicle of choice, primarily because there are many of them on the market, they have ample headroom for a 6’ 2” guy, and they are powered by an efficient and durable Mercedes-Benz commercial vehicle diesel engine. The Sprinter vans are sold under the Dodge, Freightliner, and Mercedes-Benz badges, but they are all built by Mercedes-Benz with the Mercedes-Benz diesel engine. They also come in 144” and 170” wheelbases. While there are pluses and minuses to both sizes, we opted for the 170” wheelbase since my height requires a queen-sized bed, which would leave only a modest amount of room for other amenities in the 144” wheelbase version.

After watching the market for many months and seeing very few suitable vans for sale in Minnesota in my price range (i.e. CHEAP), I had almost resigned myself to having to travel a significant distance to pick up a decent rig for a decent price. When I saw what looked like an attractive rig (decent condition, relatively low miles for a cheapish cargo van) in Northeast Minneapolis last week, I was guardedly excited. When I arranged to see it on Tuesday May 12th, I like what I saw, had a diesel mechanic check the vehicle over thoroughly, made an offer, and ended up negotiating the purchase in short order on May 13th. The 2010 Freightliner Sprinter 2500, with 173,670 miles on the odometer (just getting broken in for a M-B diesel engine!), would be the base for our tiny house on wheels for the modest sum of $9,500.

Before negotiating the purchase price, I paid a diesel mechanic to give the rig a thorough going-over to identify any potentially problematic mechanical or structural issues. It was $152 well-spent, as he confirmed that the van was in good mechanical condition, identified a damaged front cross-member in the frame that would have to be repaired for safety reasons, and gave me a ballpark figure for repairing it. With this information, I was able to negotiate a lower purchase price. 


Day Zero: Van pickup on May 14th


The adventure van in its previous incarnation
The van, previously owned by an event organizing company, had a wrap with the company’s graphics, and the owner had promised me this would be removed before I picked up the van, and assured me that the wrap wasn’t hiding any significant body/rust issues. I was notified the morning of May 14ththat the wrap would be removed by early afternoon, so I planned to ride my bike from Northfield to Northeast Minneapolis (adventure! mostly by gravel the first half of the trip!) and meet the owner for the deal at 3:15. 

It was a beautiful spring day with delightful temperatures rising through the low- to mid-60s during the 51.4-mile ride, which took just over three hours with a light side/side-tail wind out of the south-southwest. The ride was a breeze, with visions of the adventure van awaiting me and plans for its build-out filling my head. I rolled into the parking lot next to the warehouse where the van is garaged a few minutes ahead of time, and met my man Ande to do the deal a few minutes later. I was somewhat disappointed to see that removal of the wrap revealed that the van did indeed have some cancerous rust at the base of both the side cargo door and one of the rear cargo doors. I decided not to make a big deal of it, handed over the cashier’s check, and moments later was on my way home. I did stop briefly by a nearby picturesque renovated warehouse building for a glamor pre-conversion shot in the van’s home neighborhood.

The adventure van, about to be driven to its new home in Northfield


T

The van drove like a dream at all speeds. It was solid going down the road, with no suspension or tracking issues, and the M-B 3.0-liter V6 purred at freeway speed. Homeward, my lad! The adventure was just beginning!